Note: This tutorial assumes a basic working knowledge of Adobe Illustrator.
Our Zund Cutter is a great way to make customized signage, boxes, and cutouts. In order for the Zund to cut each job properly, we create a project file that contains lines that instruct the machine where to cut and where to crease the project.
Our resource library provides templates for various boxes and signage, but many projects require custom templates (cardboard cutouts, signage, etc.). Creating this template isn’t too hard, but it’s important to understand the proper way to set up your artwork.
First, you’ll need to understand the four most common types of lines that our Zund Cutter can read. They are:
Crease: Instructs the Zund Cutter to make a crease without cutting all the way through (on our cardboard box, this would translate to a fold line)
Through Cut: Instructs the Zund to make a cut all the way through the material
Kiss Cut: Instructs the Zund to make a cut partially through the project (ie, stickers where the top layer is cut but the bottom layer is one piece)
Route: Used for projects made with acrylic or metal — the Zund to uses the drill head in order to cut through the heavier material
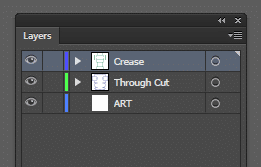
Let’s take a look at the Adobe Illustrator template for one of our cardboard promo boxes. The outline of the box has been created using the Path tool. The Crease line is green and the Through Cut line is blue. Each line is placed on it’s own layer, which is named accordingly.
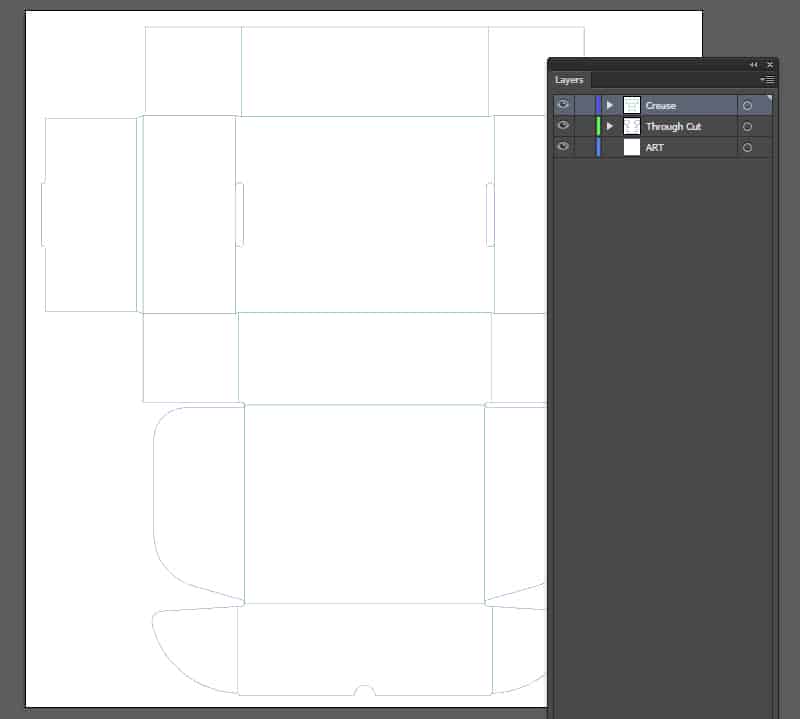
Our Digital Cutter decides which cut to make based on the name of the layer and swatch. Ex: The green swatch used for the Crease line is named, “Crease” and its layer is also named “Crease.” Follow the naming conventions used on the chart below.
| Cut Type | Layer & Swatch Name | Color Code |
|---|---|---|
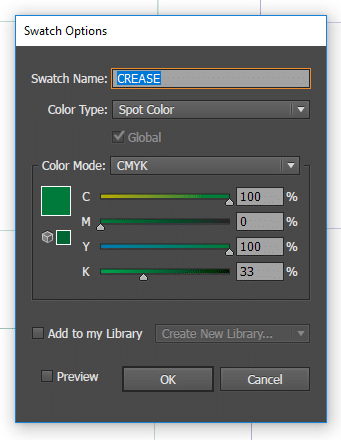
| Crease | Crease | 100-0-100-33 |
| Through | Through-Cut | 100-100-0-0 |
| Kiss Cut | Kiss Cut | 0-100-100-0 |
| Route | Route | 100-100-0-50 |
1. Create the layers for each type of cut that you will be using in your project. Make sure that they follow the proper naming conventions (see chart above).
2. Create a swatch for each type of cut that you will be using in your project. Make sure that they follow the proper naming conventions (see chart above).
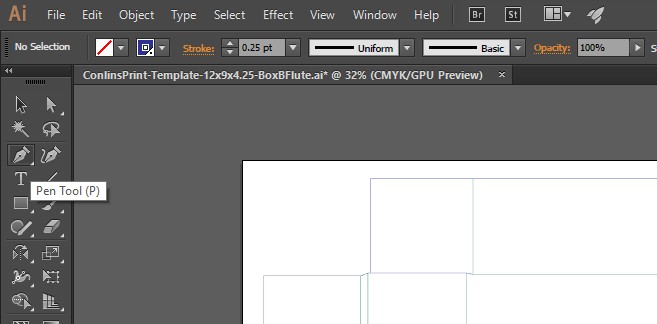
3. Using the pen tool, draw the paths for each type of line that you wish to create. They should be 0.25pt wide.
4. Assign the path to the correct swatch and layer.
5. Create a separate layer named “Art” and place your actual design on that layer.
6. TO CREATE THE PRINT FILE: Turn off the cut path layer and leave the Art layer turned on. Submit your file to the printer as 1) an .ai file with fonts converted to outlines and all links included in the file package and 2) as a PDF (the PDF serves as a reference to help us figure out if there are any problems with missing fonts or links in your Illustrator file).
7. TO CREATE THE CUT FILE: Turn off the Art layer and make sure the cut path layers are turned on. Save this as an .ai file.
Our print experts are always ready to answer your questions and ensure that your files are set up properly for print. Don’t hesitate to ask us for assistance in preparing your files!

Plus instant access to our FREE template library!
Business is powered by print – and nobody does print better than Conlin’s!
![]()
![]()
![]()
![]()
©2024 Conlin's Print.
All rights reserved.


Comments are closed.