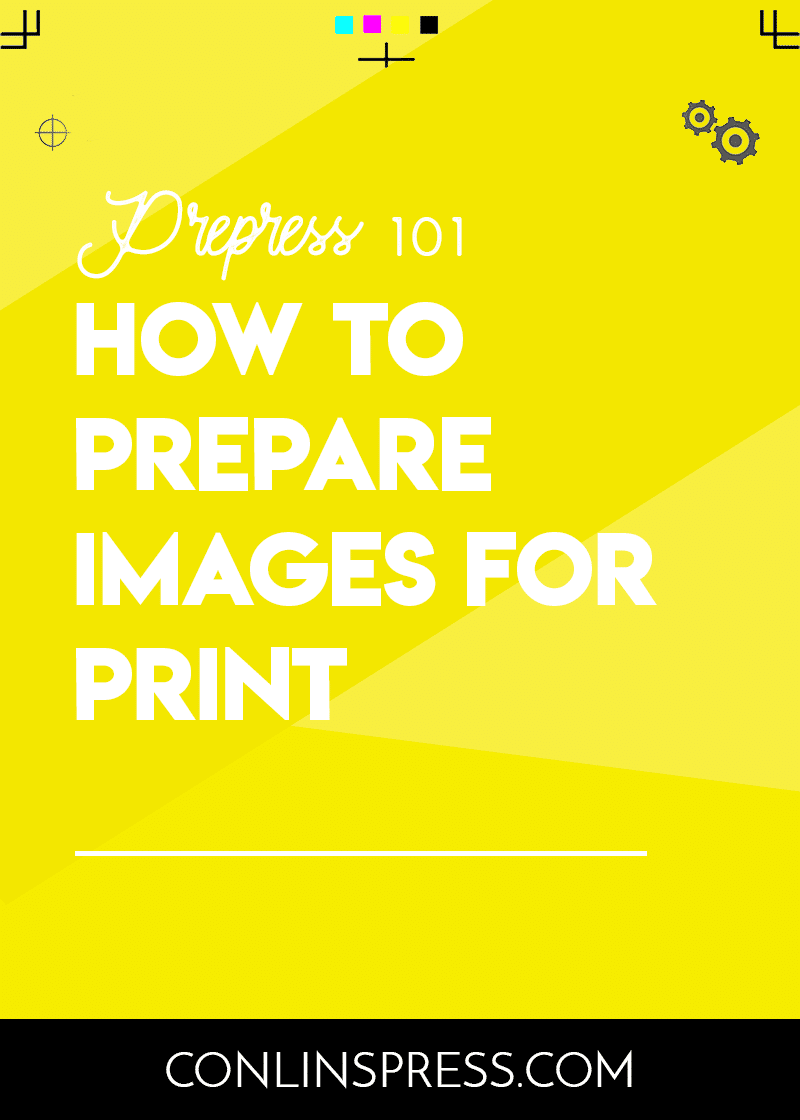
We’ve all experienced it – you (or your designer) spent time creating a beautiful print project. But when you get the proof back from the printer, you realize that your images don’t look so good. What seemed clear on the computer is pixelated on the paper. Or maybe the colors just aren’t quite as vibrant as they were on the screen.
Luckily, these issues are easily avoidable. It all comes down to knowing how to prepare quality images for print. Here are three simple things to check when selecting and prepping images for your print projects:
You’ll need to make sure that all images that you plan to use in your project are set to CMYK color mode. RGB color mode is typically the default, but this is best for photos that will be used on the internet. To optimize the colors in your print piece, they should be set to CMYK, which is the standard color mode for print.
To do this, open your image in Photoshop. Click on the Image menu and select Mode (top of menu). In the submenu, click, CMYK color mode. A dialogue box will appear. Click OK to continue.
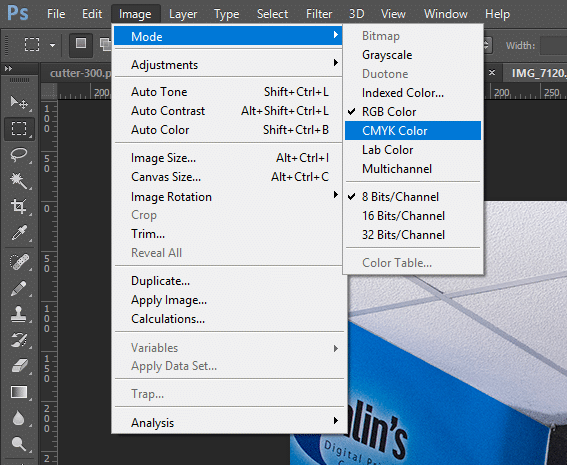
Save your image. It might be a good practice to save your converted images under a separate name or in a folder that goes with your print projects, just in case you want to use the old RGB version for a web project.
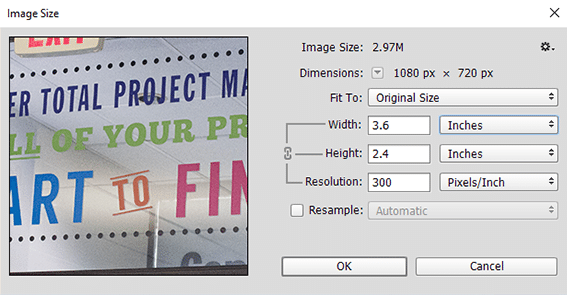
It’s important that any images you use for print are high-quality, or else you’ll end up with a lot of pixelation in the final product. The best image resolution for print is between 250-300 dpi.
To check the image resolution, go to the Image menu and select Image Size. In the box that appears, check the number next to Resolution. If it’s not 300, set it to 300. Be sure that the Resample box is NOT checked.
Once you’ve ensured that the resolution is set to 300, you’ll need to check that your images are large enough for the space that they are being printed on. Here’s a basic guide to help you convert pixels to inches.
| Inches (Printed Output) | Minimum Dimensions (Pixels) |
|---|---|
| 4" x 6" | 640 x 480 |
| 5" x 7" | 1024 x 768 |
| 8" x 10" | 1536 x 1024 |
| 16" x 20" | 1600 x 1200 |
TIP: If you are taking photos yourself, make sure that your camera is set to take pictures at the highest output size.
If you are printing something that is large format (such as a trade show sign or a billboard), your file is going to need to be pretty large in order to avoid pixelation. This is when vector images come in handy.
A raster image has a set size. This logo.png file is 112 x 58 pixels. When resized, the image will become pixelated. Raster file types include .jpg, .png, .gif, and . tif.
![]()
A vector image will automatically resize itself to fit a large space. This logo.eps file was created in Adobe Illustrator. It can be resized to fit a business card or to fill up a large billboard. Vector file types include .ai, .eps, .pdf, .svg.
![]()
When it comes to graphics such as logos, vector files are always the safest format to use. This is especially true if you are printing large format.
When sending your finished design file to the printer, make sure that all images are packaged with the file (especially if you are sending an InDesign file). That way your project won’t have any missing links!
Plus instant access to our FREE template library!
Business is powered by print – and nobody does print better than Conlin’s!
![]()
![]()
![]()
![]()
©2024 Conlin's Print.
All rights reserved.


3 Comments